Maya的PaintEffects制作头发全过程(4)
来源:互联网 作者:未知 发布时间:2010-05-09 22:15:53 网友评论 0 条
3.Paint Effects
下面我们将添加一些头发,执行 Paint Effects->Get Brush 进入 Visor ,打开 brushes/hair/ 文件夹,选择 hairRed1.mel (或其它你喜欢的样式)。选择 hair_control_curve01 , PaintEffects->Curve Utilities->Attach Brush to Curves ,这样会为 hair_split_curve01 创建一个粗糙的毛发效果。在 outliner 中将新建的这个 stroke 命名为 hair_side_stroke01 ,新的笔刷命名为 hair_side_brush 。

(图9)
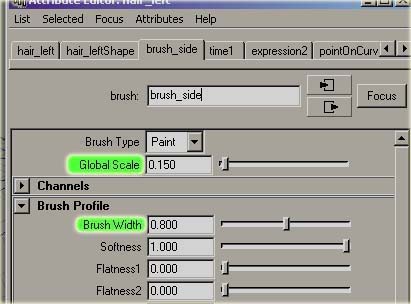
在 outliner 中双击 stroke 打开属性面板,在笔刷页中,首先调整 Global Scale 值,这个值的大小取决于你的头部模型的大小,我的角色总共 8cm 高,在这里将值设为 0.150 。如果你的角色高度为 160cm 的话,值应为 3 。打开 Brush Profiles 找到 Brush Width ,这个值控制从曲线长出的头发的宽度,将值设为 0.8 (不要将它设的太低,这样会使你的头发看上去非常薄)。其他的属性保持为默认。

(图10)
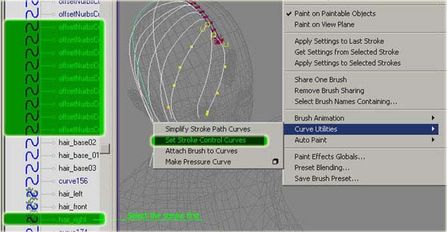
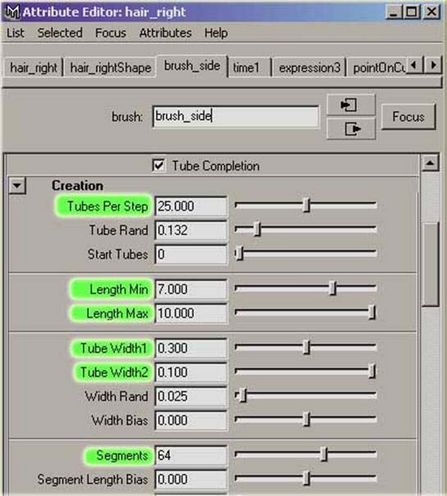
现在在 outliner 中再次选择 hair_side_stroke01 ,并通过 shift 同时选中所有位于头部一侧的 hair_control_curve (左侧或右侧),执行 Paint Effects->Curve Utilities->Set Stroke Control Curves ,打开 hair_side_brush 属性面板, tubes/Behavior/forces 中,将 CurveFollow 设为 1 ,这样可使头发沿 hair_control_curve 生长。进入 hair_side_stroke01 ,将显示质量设为 10 左右(加速显示更新速度)。

(图11)
- 2010-08-25
- 2010-08-25
- 2010-08-25
- 2010-05-10
- 2010-08-25
- 2010-08-17
- 2010-05-09
- 2010-05-09
- 2010-08-25
- 2010-08-17
- 2010-08-25
- 2010-05-10
- 2010-08-25
- 2010-08-25
- 2010-08-25
关于我们 | 联系方式 | 广告服务 | 免责条款 | 内容合作 | 图书投稿 | 招聘职位 | About CG Time
Copyright © 2008 CGTime.org Inc. All Rights Reserved. CG时代 版权所有