Illustrator实例教程:彩色的喷溅特效图(3)
来源:互联网 作者:未知 发布时间:2010-07-07 09:04:47 网友评论 0 条
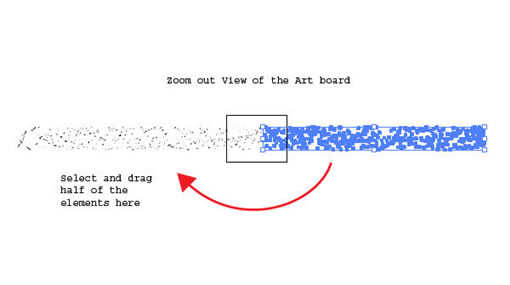
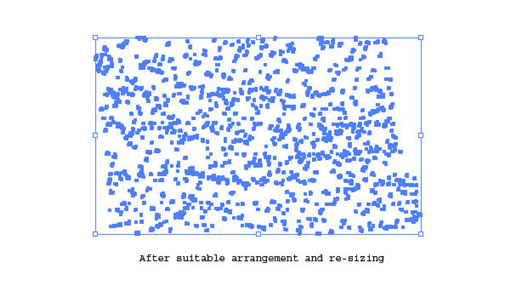
Step 4
放大视图,查看整个的这些小形状。选择其中的一半,拖拽他们到另一半上面。重新把他们排列成一个正方形。 你可能要重新定义选择的这些元素的尺寸,以适合你的画布
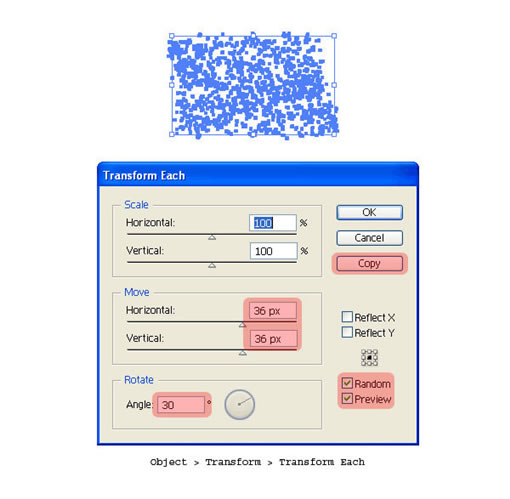
Step 5
现在,基本的我们的喷溅元素已经准备好了。选择全部的小形状,单击 对象 > 变形 > 单独变形 (Alt + Shift + Command + D)。输入横向/纵向值为30px. 再循环中输入30度,选择随机。然后点击复制。
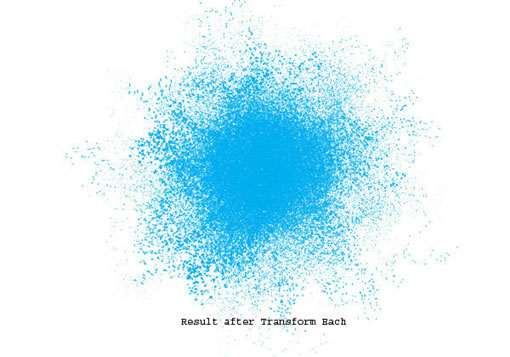
Step 6
现在,不要点击任何地方,按住 Command + D 重复大概 25 到 30 次直到你看到类似于下面的图像效果。 (You may encounter a slower performance due to increase in number of anchor nodes. Once the high resolution raster file is exported, we need not worry about the performance).
- 2009-10-14
- 2009-10-14
- 2009-10-14
- 2009-10-14
- 2009-10-14
- 2009-10-14
- 2009-10-14
- 2009-10-14
- 2009-10-14
- 2009-10-14
- 2009-10-14
- 2009-10-14
- 2009-10-14
- 2009-10-14
- 2009-10-14
关于我们 | 联系方式 | 广告服务 | 免责条款 | 内容合作 | 图书投稿 | 招聘职位 | About CG Time
Copyright © 2008 CGTime.org Inc. All Rights Reserved. CG时代 版权所有