MAYA金属材质教程(2)
来源:互联网 作者:未知 发布时间:2010-08-07 09:55:21 网友评论 0 条
First step of texturing lays on the decision of what material is my object made of, I mean, if it's unpolished or metallic, industrial or organic. This make the process of adjusting its attributes by the software faster . One way for accomplish this if we are short of time is to walk through the texture library and which ones could be of great utility for the result to reach and store then to retouch them later. Personally, this is a very inspiring step, and the detail of certain textures always suggest me more ideas for my final result.
Once he have in our sourceimages folder a few textures to start defining the object, we test its behavior over itself. In this step it's important the way the textures wraps the object, that is, if that texture covers the object as a cloth (connected to a 2d placement node) or if its projected over it (connected to a 3d placement node).
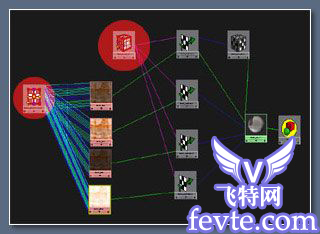
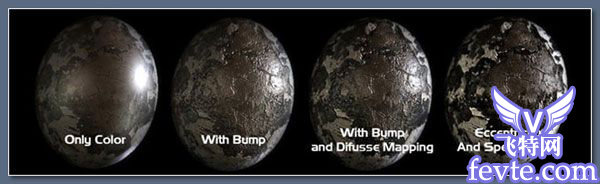
For a quick texturing, it will be enough to map the color attributes, diffuse, bump and specular power. If the material is metalic, it will be necessary to map the specular color too. Every texture of the material will be conected to the same placement node, in such a way that when moved it will affect all of them. If we choose the texture correctly, it will be enough to move or rotate the placement nodeup to reach the desired effect, mainly when there is no problem because the texture is tiled.
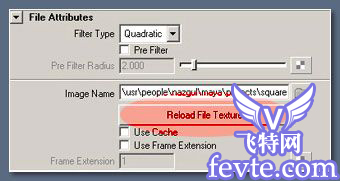
Once the texture takes the shape we decide over the object, we fine tune the material attributes by retouching the texture image in Photoshop and pressing the reload button of the file node.
- 2010-08-25
- 2010-08-25
- 2010-08-25
- 2010-05-10
- 2010-08-25
- 2010-08-17
- 2010-05-09
- 2010-05-09
- 2010-08-25
- 2010-08-17
- 2010-08-25
- 2010-05-10
- 2010-08-25
- 2010-08-25
- 2010-08-25
关于我们 | 联系方式 | 广告服务 | 免责条款 | 内容合作 | 图书投稿 | 招聘职位 | About CG Time
Copyright © 2008 CGTime.org Inc. All Rights Reserved. CG时代 版权所有