Maya建模教程:鸟类建模(6)
来源:互联网 作者:未知 发布时间:2010-12-19 19:09:49 网友评论 0 条
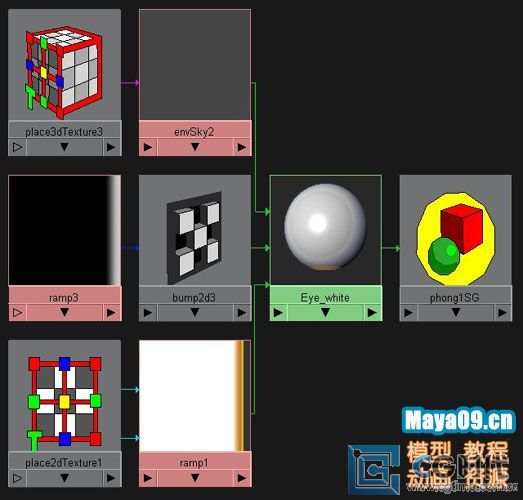
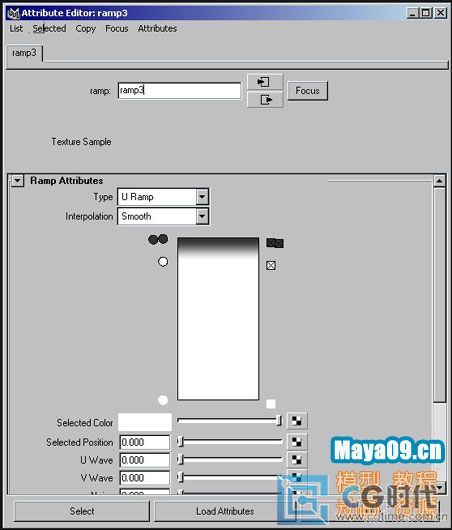
步骤 15 Bump ramp 贴图由黑白两色组成,当你完成 Bump ramp 贴图设置后,点击  按钮,进入 bump 2d placement node 窗口,改变 Bump Depth 值为1.5 - 1.6。is made the same way as color, just that it consist of black and white colors. One more thing which you will have to do when you're finished making bump ramp - you will have to click on output button on the top of ramp Attribute Editor's window, and it will lead you to , where you will have to change value to to get right effect from this texture.
在Panels 菜单中选择 Saved Layouts > Hypershade/Perspective,选择眼珠并右键点击 hypershade 窗口中的眼睛材质并选择 Assign material to selection 。
步骤 16 选择 Shading > Hardware texturing你将看到贴图效果。
步骤 17 创建眼皮。首先创建一个球体,在 NURBS Shpere Options 窗口中,将radius 值稍微调大一点,并将 axis 设为X。确定球体为选择状态,打开右侧状态栏中 INPUTS 下 makeNurbsSphere2 选项,点击“End sweep”并按住鼠标中键在工作区左右移动,这时我们会得到类似眨眼的效果,按下图设置球体。

- 2010-08-25
- 2010-08-25
- 2010-05-10
- 2010-08-25
- 2010-05-09
- 2010-05-09
- 2010-08-25
- 2010-08-17
- 2010-08-25
- 2010-08-25
- 2010-05-09
- 2010-08-17
- 2010-05-10
- 2010-08-25
- 2010-08-25
关于我们 | 联系方式 | 广告服务 | 免责条款 | 内容合作 | 图书投稿 | 招聘职位 | About CG Time
Copyright © 2008 CGTime.org Inc. All Rights Reserved. CG时代 版权所有