Illustrator绘图教程:绘制矢量的卡通绿叶(2)
来源:互联网 作者:未知 发布时间:2011-03-22 19:16:52 网友评论 0 条
Step 3
Expand the strokes (Object > Expand), select them all and from the Pathfinder panel press merge.
3.扩展描边(对象>扩展),全部选中,切到路径查找器调板,按合并按钮。
注:合并的话得不到图示的路径,我重新写一下。
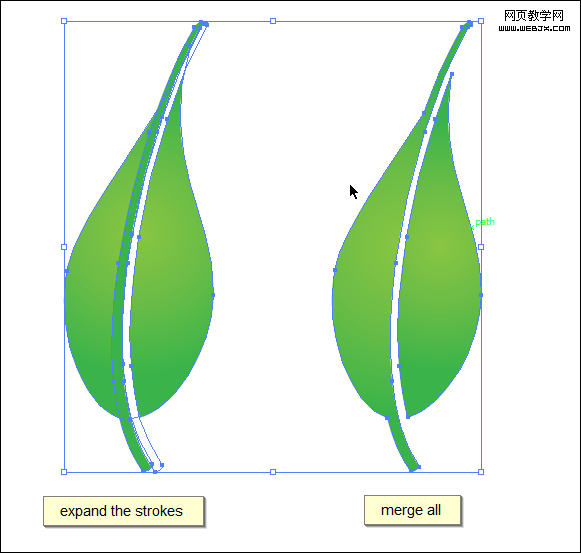
扩展描边后,叶子和扩展后的绿色描边形状相加,然后减去扩展后的白色描边(在路径查找器中完成)。完成后得到上图右边的路径。
注:白色描边的堆栈顺序必须在叶子和绿色描边形状相加后的复合路径之上。
形状相减的另一层隐义就是减去前面的形状。
相加相减之后叶子可能需要重新填色渐变,重新填色即可。
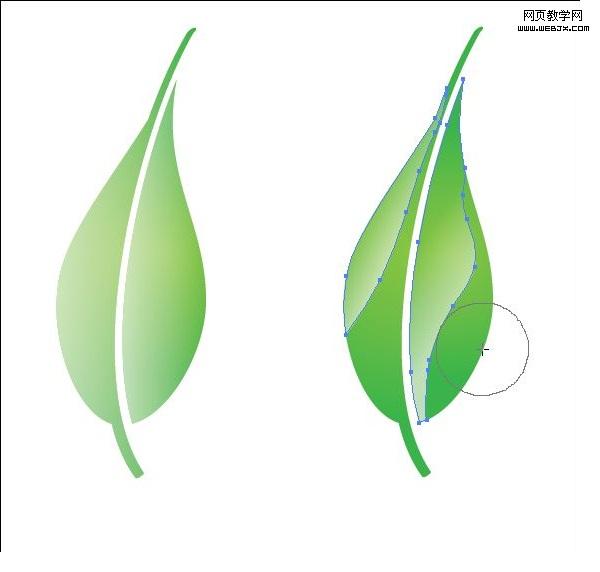
Step 4
Select the leaf then press (Command + C) for copy, (Command + F) paste in front, select the copy and fill it with gradient of half opacity white to 0 opacity white. Erase parts of the leaf (like in the image) to make the leaf shine.
4.选择叶子,然后按Ctrl+C复制,Ctrl+F粘贴在前面,选择副本,填色50%不透明白色到0%不透明白色渐变。去除叶子多余的部分(如图)以创建叶子的光亮面。
- 2009-10-14
- 2009-10-14
- 2009-10-14
- 2009-10-14
- 2009-10-14
- 2009-10-14
- 2009-10-14
- 2009-10-14
- 2009-10-14
- 2009-10-14
- 2009-10-14
- 2009-10-14
- 2009-10-14
- 2009-10-14
- 2009-10-14
关于我们 | 联系方式 | 广告服务 | 免责条款 | 内容合作 | 图书投稿 | 招聘职位 | About CG Time
Copyright © 2008 CGTime.org Inc. All Rights Reserved. CG时代 版权所有