Photoshop教程:绘制逼真的油漆毛刷(9)
来源:互联网 作者:未知 发布时间:2011-05-25 10:52:34 网友评论 0 条
Step 15
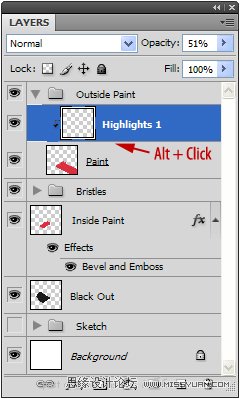
Now, we are going to give thepaint that wet look. To start, create a New Layer called “Highlights 1″ andmake this a clipping layer (use Alt + Click on the Layers Panel).
现在,我们要给油漆湿感,新建一个名为“Highlights 1” 图层,制作一个剪切层(在图层板上使用Alt+单击 )
Step 16
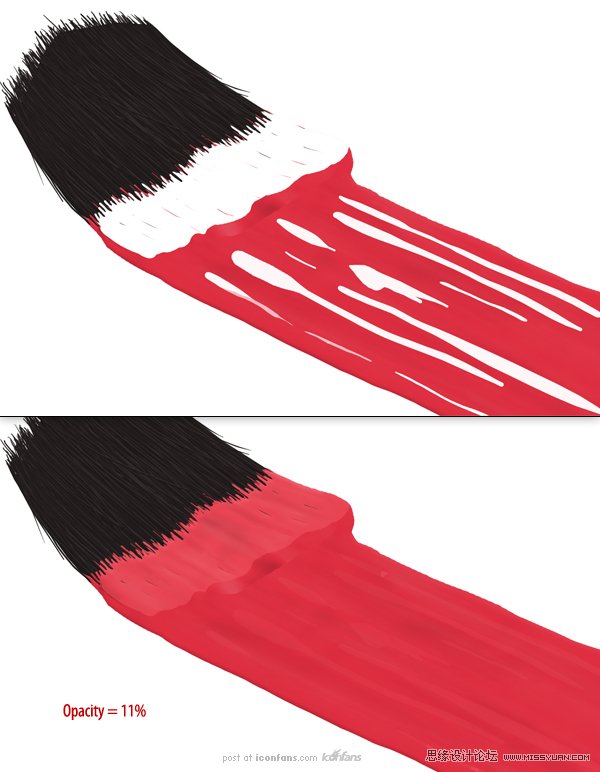
Now, draw in some white highlights as shown. Set this layer’sopacity to 11%
(现在如图所示,绘制一些白色的高光,设置这个图层的不透明度为11%。)
Step 17
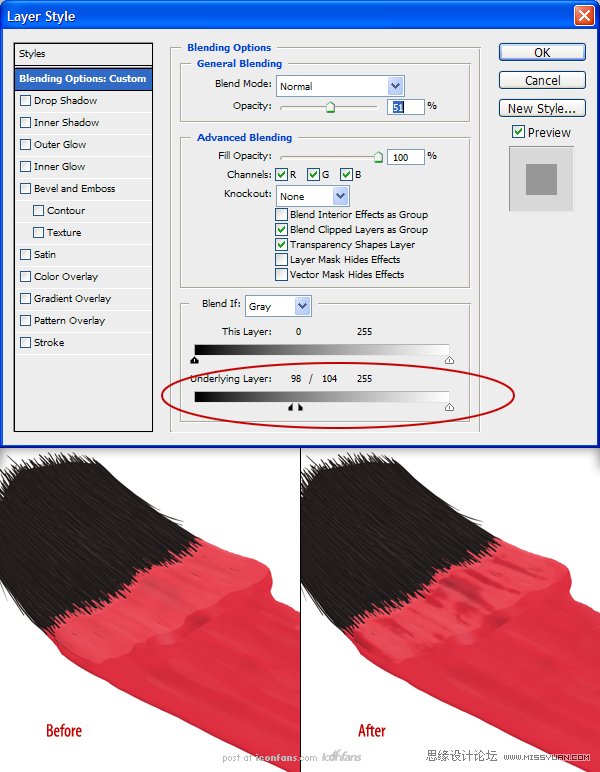
Open the layer’s Layer Styles and adjust the “Blend If: UnderlyingLayer” sliders as shown
(打开这个图层的图层样式,调节“混合颜色带”滑标如图所示. )
- 2009-10-19
- 2009-10-19
- 2009-10-19
- 2009-10-19
- 2009-10-19
- 2009-10-19
- 2009-10-19
- 2009-10-19
- 2009-10-19
- 2009-11-22
- 2009-10-19
- 2009-11-24
- 2009-10-19
- 2009-10-19
- 2009-10-19
关于我们 | 联系方式 | 广告服务 | 免责条款 | 内容合作 | 图书投稿 | 招聘职位 | About CG Time
Copyright © 2008 CGTime.org Inc. All Rights Reserved. CG时代 版权所有