Photoshop教程:绘制逼真的油漆毛刷(11)
来源:互联网 作者:未知 发布时间:2011-05-25 10:52:34 网友评论 0 条
Step 20
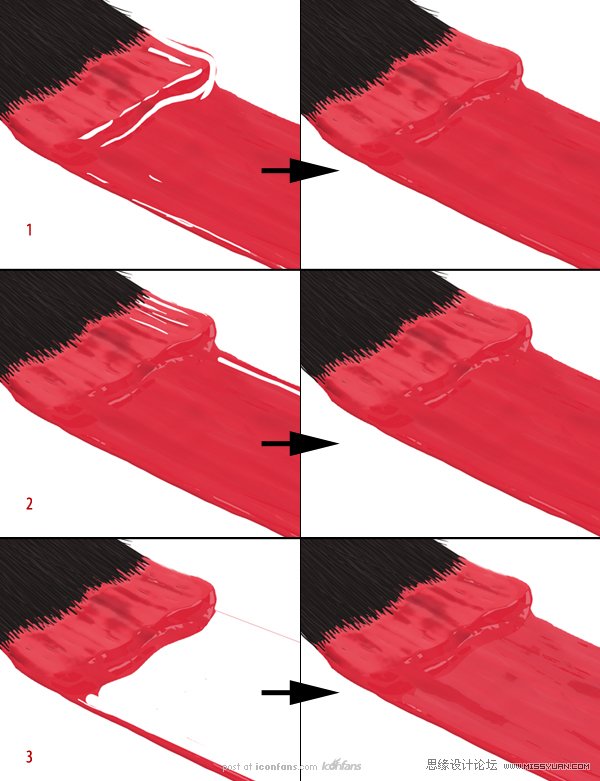
We can keep using thistechnique of adding highlights and adjusting its Blend If sliders to completethe ‘wet’ look of paint (I used this technique to add 3 more highlights).(我们可以用同样的手法添加“highlights”,调节它的“混合颜色带“滑标来完成油漆的湿感(我用这个方法添加了3个以上的“highlights”.)
Step 21
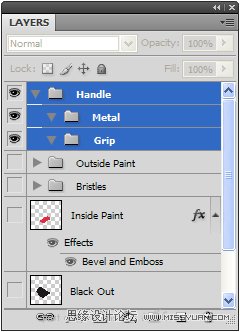
Now that the bristles and paintare done, we can create the rest of the brush. Hide all layers associated withthe paint and bristles. Next, create a New Group called “Handle”. Inside thatgroup, create 2 new groups called “Metal” and “Grip”.
(现在刷毛和油漆已经完成,我们可以创建毛刷的其他部分。隐藏所有有关刷子和刷毛的图层。接下来,新建一个组名为“Handle”。在这个组里,新建2个组,分别命名为“Metal”and “ Grip”.)
Step 22
In the “Metal” group, create aNew Layer called “Metal Band.” Using the sketch as a guide, create the shape ofthe metal band that holds the bristles in place. I found it easier to createthe brush’s handle upright. It may help to go back to the sketch and create acopy to rotate it so that the brush is standing up.
(在“Metal”组里,新建一个图层名为“Metal Band”。以草图为参考,创建能包住刷毛的金属带。我觉得创建一个垂直的刷柄很容易。它可以幫助回到草圖,並創建一個副本,旋轉,這樣的刷子就能竖起来。)

- 2009-10-19
- 2009-10-19
- 2009-10-19
- 2009-10-19
- 2009-10-19
- 2009-10-19
- 2009-10-19
- 2009-10-19
- 2009-10-19
- 2009-11-22
- 2009-10-19
- 2009-11-24
- 2009-10-19
- 2009-10-19
- 2009-10-19
关于我们 | 联系方式 | 广告服务 | 免责条款 | 内容合作 | 图书投稿 | 招聘职位 | About CG Time
Copyright © 2008 CGTime.org Inc. All Rights Reserved. CG时代 版权所有