Photoshop教程:绘制逼真的油漆毛刷(5)
来源:互联网 作者:未知 发布时间:2011-05-25 10:52:34 网友评论 0 条
Step 7
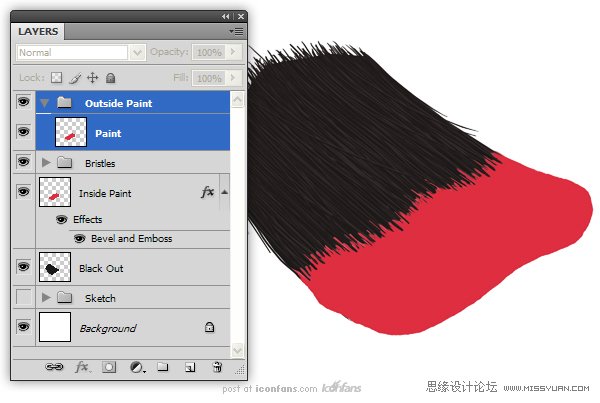
Now, we can add the paint on top of the bristles. Create a New Groupcalled “Outside Paint” above the “Bristles” group and use the brush tool to addanother blob of the same color to the tip of the brush. Use the same techniquewith the Smudge Tool to push the color on to random bristles.
(现在我们在刷毛的顶部添加油漆。在“Bristles”组之上新建一个组名为“OutsidePaint”,用画笔工具添加一个相同的颜色到刷子的末端。使用涂抹工具,用同样的手法和技巧随意的拖动刷毛。)
Step 8
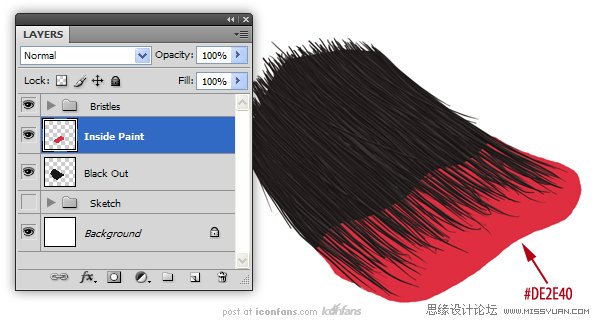
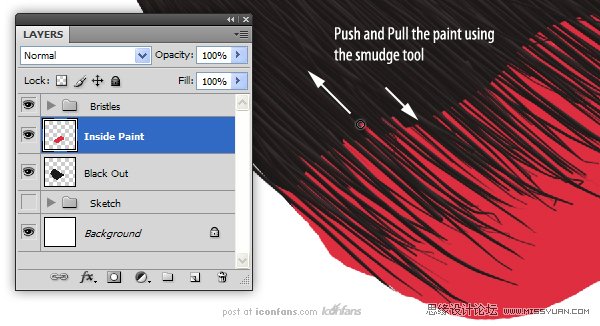
To create the effect that thebristles have ‘taken’ the paint, use the Smudge Tool, set to 100%, to push thepaint on to random bristles.
(为了制造出刷毛完全吸收油漆颜料的效果,使用涂抹工具,设置为100% ,随意的拖动刷毛。)
Step 9
Now, we can add the paint ontop of the bristles. Create a New Group called “Outside Paint” above the“Bristles” group and use the brush tool to add another blob of the same colorto the tip of the brush. Use the same technique with the Smudge Tool to pushthe color on to random bristles.
(现在我们在刷毛的顶部添加油漆。在“Bristles”组之上新建一个组名为“OutsidePaint”,用画笔工具添加一个相同的颜色到刷子的末端。使用涂抹工具,用同样的手法和技巧随意的拖动刷毛。)
- 2009-10-19
- 2009-10-19
- 2009-10-19
- 2009-10-19
- 2009-10-19
- 2009-10-19
- 2009-10-19
- 2009-10-19
- 2009-10-19
- 2009-11-22
- 2009-10-19
- 2009-11-24
- 2009-10-19
- 2009-10-19
- 2009-10-19
关于我们 | 联系方式 | 广告服务 | 免责条款 | 内容合作 | 图书投稿 | 招聘职位 | About CG Time
Copyright © 2008 CGTime.org Inc. All Rights Reserved. CG时代 版权所有