Maya实例教程:制作龙卷风效果(2)
来源:互联网 作者:未知 发布时间:2011-08-09 11:31:22 网友评论 0 条
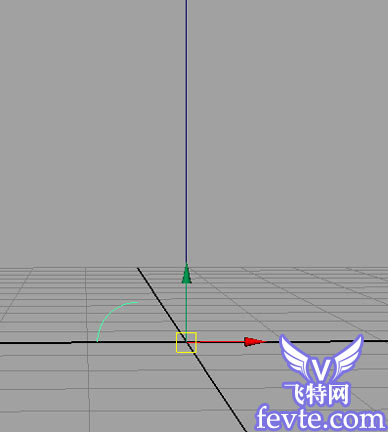
选中这个 circle, 按下 insert 键 , 使用网格捕捉将 pivot 放到原点 .
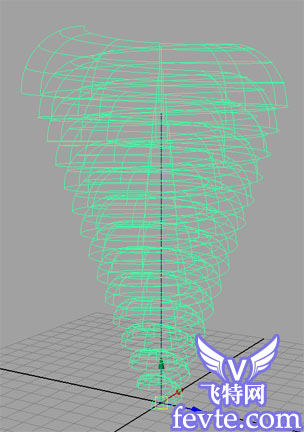
先选择 Nurbs Circle 然后选择曲线 , 在建模菜单下选择 Surfaces %26gt; Extrude 命令 , 并在 Channel Box 中设置
如下属性 .
Fixed Path : ON
Use Component Pivot : ON
Use Profile Normal : OFF
Rotation : 5000
Scale : 6
这样将会出现下图的形状 , 你可以通过调整 Rotation 和 Scale 来调整形状 .
- 2010-08-25
- 2010-08-25
- 2010-05-10
- 2010-08-25
- 2010-05-09
- 2010-05-09
- 2010-08-25
- 2010-08-17
- 2010-08-25
- 2010-05-09
- 2010-08-25
- 2010-08-17
- 2010-05-10
- 2010-08-25
- 2010-08-25
关于我们 | 联系方式 | 广告服务 | 免责条款 | 内容合作 | 图书投稿 | 招聘职位 | About CG Time
Copyright © 2008 CGTime.org Inc. All Rights Reserved. CG时代 版权所有