3ds Max建模教程:打造超逼真吉他(6)
来源:互联网 作者:未知 发布时间:2011-09-27 11:17:16 网友评论 0 条
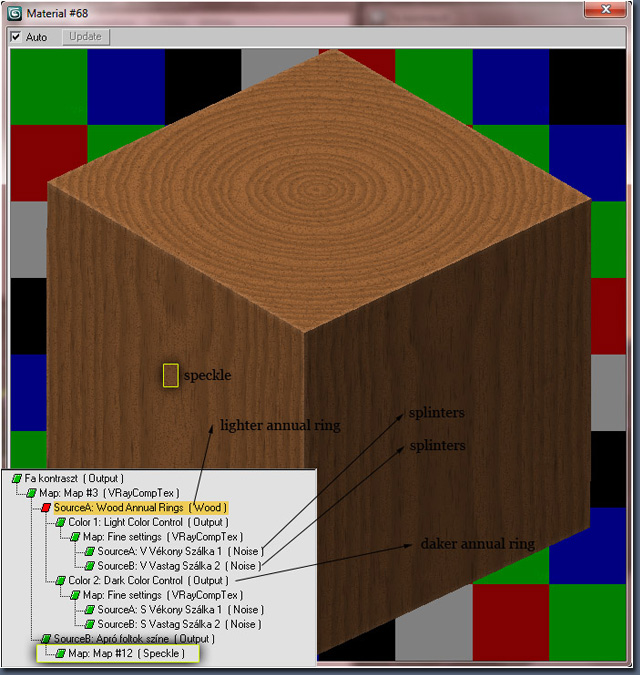
图11
A few corrections were needed to get a correct result. The first thing was to set the direction of the annual rings and the splinters. To do that I tried to guess how the annual rings and splinters became parallel. 图12 and 图13 show the coordinates of the splinters, and 图14 shows the coordinates of the wood map. With these settings the two types of maps were parallel and they were also in-line with the Z-axis of the object.
为了得到正确的结果需要经过多次调节。首先要做的是设置圆形的年轮和竖着的年轮的方向,为了达到目的,我尝试着猜测年轮里面的纹理是如何平行的。图12 和图13显示了下杂点的坐标设置。图14显示木纹纹理的坐标设置。使用这些参数设置,两种类型的纹理就平行了,同时纹理也和物体的Z方向一致。
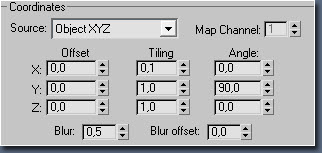
图12
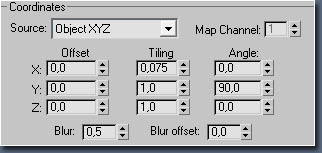
图13

图14
- 2009-10-20
- 2011-01-11
- 2009-10-20
- 2010-12-03
- 2009-10-20
- 2009-10-20
- 2009-03-30
- 2009-04-17
- 2009-10-20
- 2009-10-20
- 2010-08-17
- 2009-10-20
- 2009-10-20
- 2009-10-16
- 2009-10-20
关于我们 | 联系方式 | 广告服务 | 免责条款 | 内容合作 | 图书投稿 | 招聘职位 | About CG Time
Copyright © 2008 CGTime.org Inc. All Rights Reserved. CG时代 版权所有